Home Automation with Raspberry Pi
August 12, 2025
From a family hack to a real-time Rust system
It all started with a project by my father, an electrician with a knack for tinkering. He figured out how to extend the functionalities of our Somfy motorized roller shutters despite the fact that there's no official API and the radio signal being protected.
His solution? Open the remote, solder a few wires directly onto the printed circuit board, and connect them to a Raspberry Pi — a tiny credit-card-sized computer.
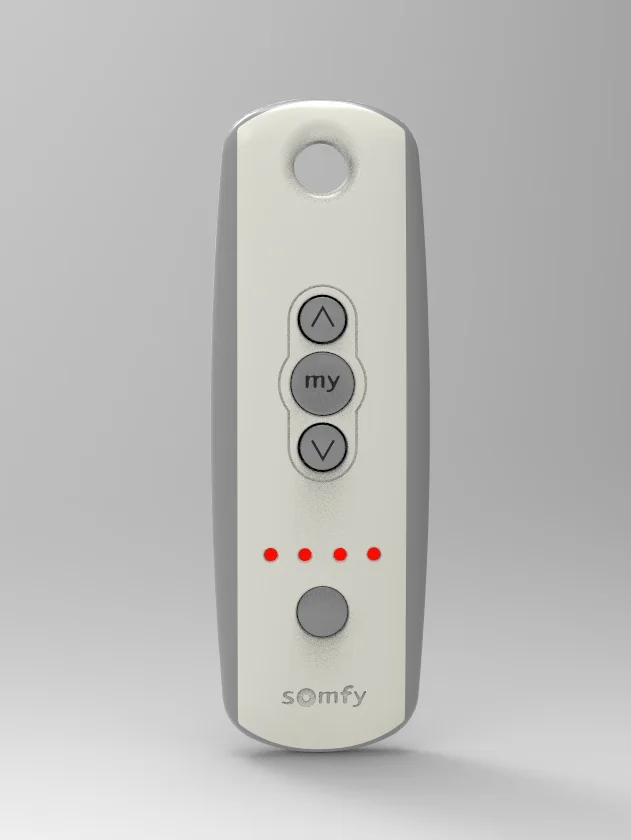
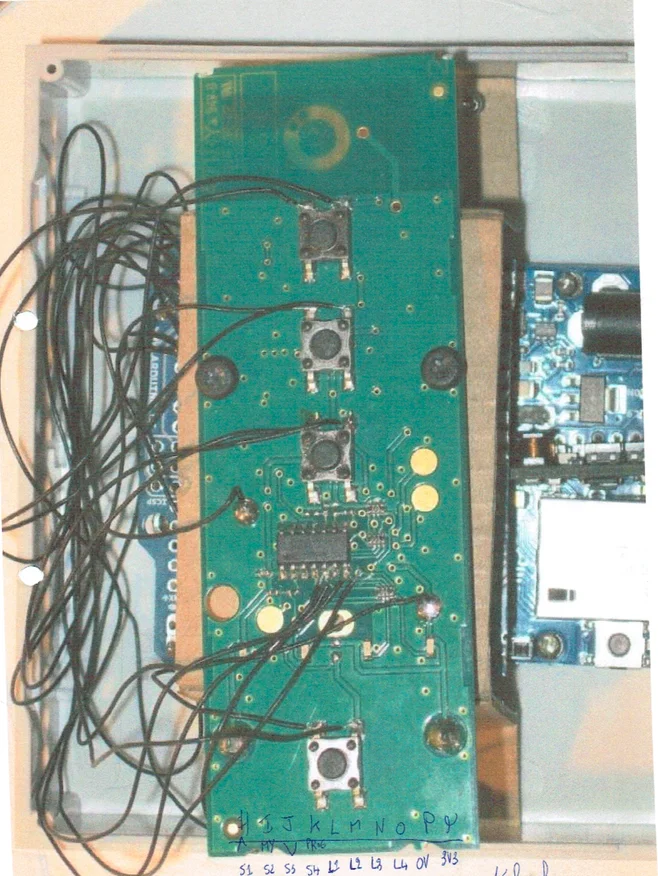
The system worked: a small Python server, a basic interface, and I could open or close my blinds from a browser. Even though the user interface wasn’t very pleasant, I was fascinated by how the code communicated directly with the hardware. That was the moment for me to dive into the code and see how far I could push the idea.
Imagine controlling your blinds from anywhere, ensuring your shutters are closed when you're away, or having them automatically open at sunrise based on the weather.
How It's Wired
[ Somfy Remote ]
   ↑ LEDs (L1..L4)
   ↓ Buttons (UP, STOP, DOWN, SELECT)
        │
        ├──> Wires soldered to PCB
        │
[ Raspberry Pi ]
   ↔ GPIO (Inputs/Outputs)
   ↔ Rust Server
   ↔ Web UI (PC / Mobile)
The Raspberry Pi "presses" the remote's buttons and "reads" which LEDs are lit to know which blind is selected.
From Python to Rust: Many Iterations
- Command-line interface — simple but not user-friendly
- Firebase + Python — cloud-synced state
- Pusher (WebSocket) — real-time updates
- Mobile apps — Flutter, Android Compose, SwiftUI
- Modern web UI — Next.js and PWA for desktop access
Each version taught me something new, but I wanted something fast, reliable, and 100% local.
The Final Version
- Rust server (Axum) controlling Raspberry Pi GPIO
- Preact web app (Vite + Tailwind) with a tactile remote-like UI
- WebSocket communication for instant updates across all devices
For more details, check out the GitHub repository.
The Interface
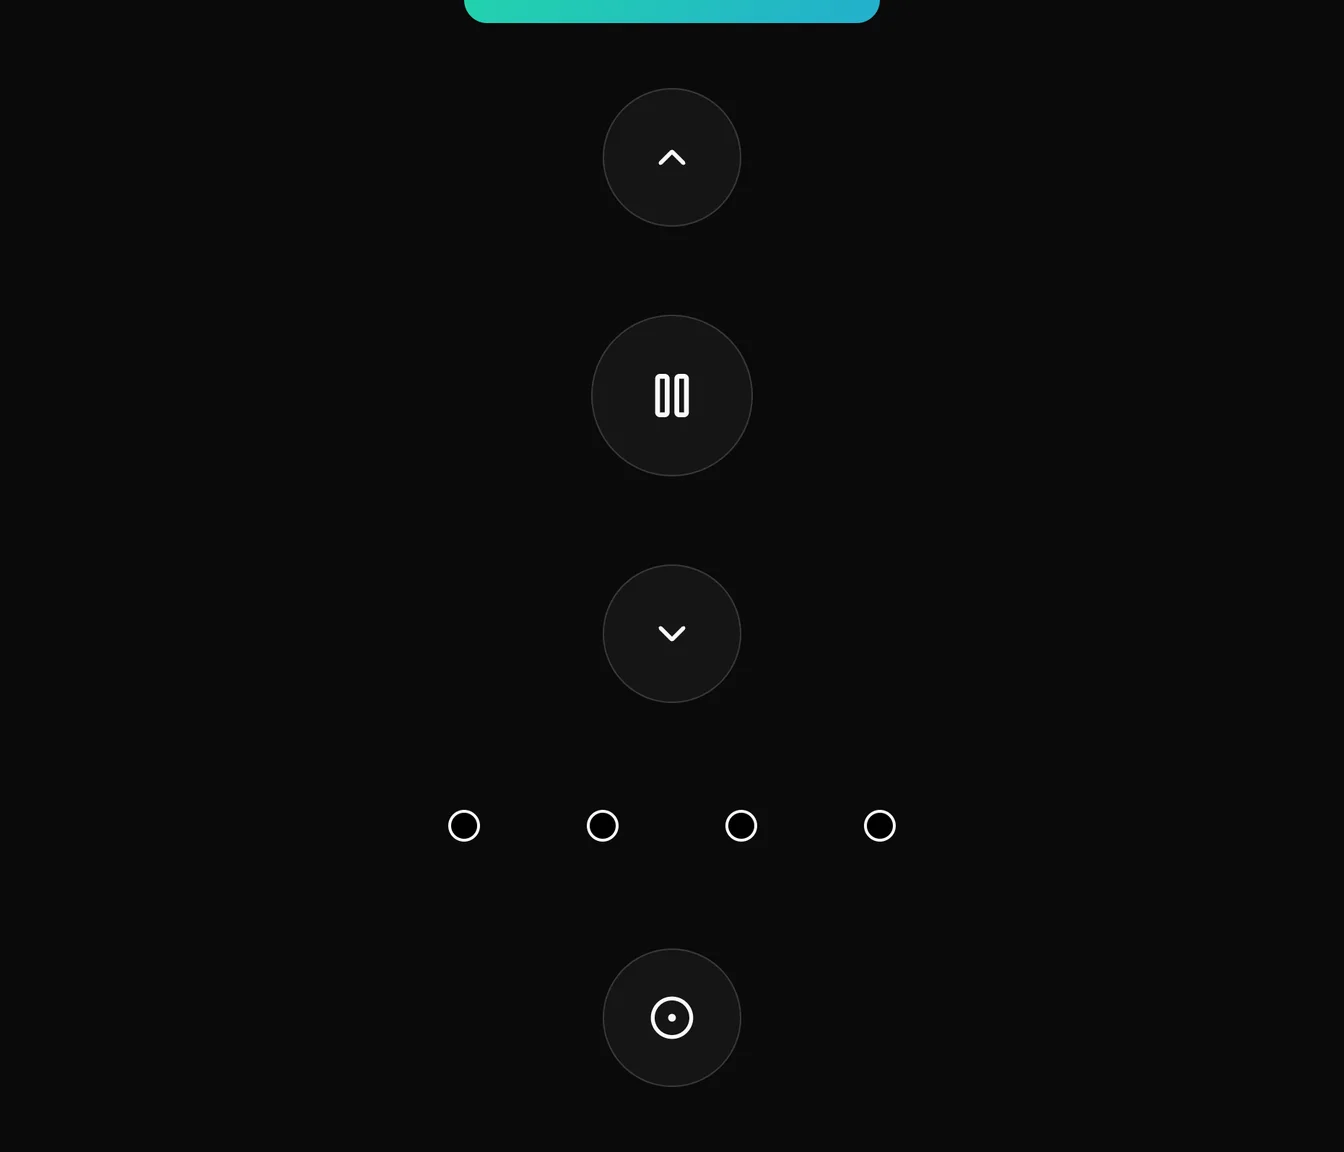
- Top indicator: WebSocket connection status (green = connected, red = disconnected, blue = connecting)
- Up: Raise the selected blind
- Pause: Stop moving the selected blind
- Down: Lower the selected blind
- LED row: Shows which blind is selected (L1 → L4) or ALL
- Select button:
- Short press: Cycle through L1 → L2 → L3 → L4 → ALL → L1 etc.
- Long press: Select ALL directly
- Click a LED: Jump directly to that blind
Fun fact: Opening this page on multiple devices shows that everything is perfectly synchronized in real time since we're all using the same virtual remote.
Code: Pressing a Button
pub enum Output { Select = 6, Down = 13, Stop = 19, Up = 26 }

pub fn trigger_output(output: Output) -> Result<()> {
    let offset = output as u32;
    let req = Request::builder()
        .on_chip("/dev/gpiochip0")
        .with_line(offset)
        .as_output(Value::Active)
        .as_active_low()
        .request()?;
    thread::sleep(Duration::from_millis(60)); // press for 60ms
    req.set_lone_value(Value::Inactive)?;
    Ok(())
}
Press this button for 60 milliseconds, then release it.
Detecting the "ALL" Mode
On a Somfy remote, the ALL mode doesn't show as a single LED — instead, all LEDs blink rapidly. To detect this, I watch for multiple quick changes on the LED inputs within a short time window.
pub async fn watch_inputs() -> Result<Input> {
    let offsets = [
        Input::L1 as u32,
        Input::L2 as u32,
        Input::L3 as u32,
        Input::L4 as u32,
    ];

    let req = Request::builder()
        .on_chip("/dev/gpiochip0")
        .with_lines(&offsets)
        .as_input()
        .with_edge_detection(EdgeDetection::BothEdges)
        .request()
        .context("Failed to request GPIO lines")?;

    let mut events = AsyncRequest::new(req).edge_events();
    let deadline = Instant::now() + Duration::from_millis(300);
    let mut last_event = None;
    let mut event_count = 0;

    // 16 = 4 inputs × 2 edges × 2 transitions
    const ALL_EVENTS_THRESHOLD: u32 = 16;

    while event_count < ALL_EVENTS_THRESHOLD {
        match timeout_at(deadline, events.next()).await {
            Ok(Some(Ok(event))) => {
                last_event = Some(event.offset);
                event_count += 1;
            }
            Ok(Some(Err(err))) => return Err(err).context("GPIO edge event"),
            _ => break,
        }
    }

    if event_count < ALL_EVENTS_THRESHOLD {
        Input::try_from(last_event.unwrap())
    } else {
        Ok(Input::ALL)
    }
}
Watch the LEDs for 300ms. If there are many rapid changes, it's ALL mode. Otherwise, take the last LED lit as the current selection.
Security
Since I can control my blinds from outside my home, I use Cloudflare Tunnel to access the interface without exposing my network to the public.
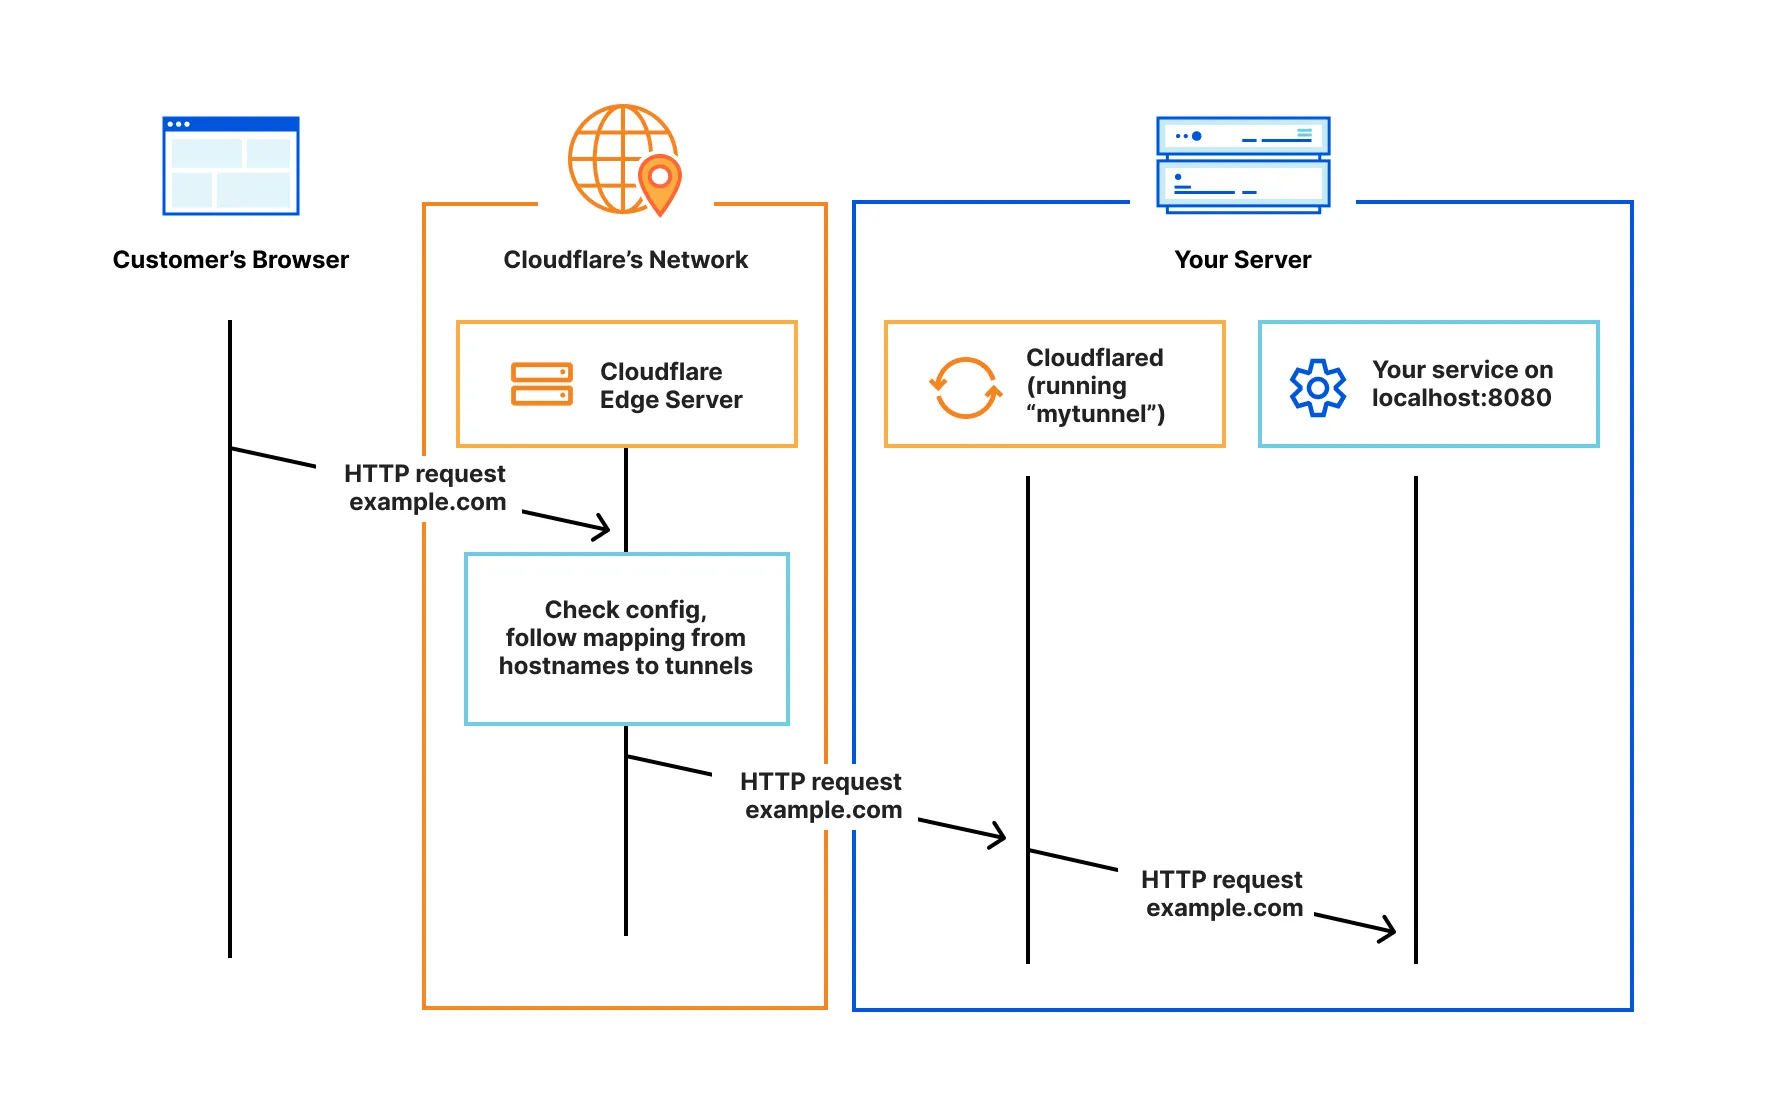
No unexpected "who just played with my blinds?" moments.
Why This Project Matters
- Shows my curiosity: I explored multiple tech stacks before finding the right fit
- Proves my ability to work with real hardware and understand its constraints
- Demonstrates technical rigor: clean, reactive, secure, and maintainable code
And, of course… it lets me open my blinds from bed, which is a luxury I fully enjoy.
Next Steps
Maybe connect the system to the weather or a smart alarm, so my blinds open automatically at sunrise… but only if I'm not planning to sleep in.